Hacks, hobbies, and side hustles: Scales and stuffing
Evan Shimizu’s interest in dragon-making shifted from human-sized to manageable
Photography by Evan Shimizu
I’m an experience developer on the Design Prototyping team and in my free time I make dragons and dragon things. When I say I “make dragons,” I mean stuffed dragons. But plushies are sort of a new development for me. Although I'm working on reasonably sized dragons now, that’s not where this story began.
Prior to working on stuffed dragons, I’d been working with aluminum scales. To elaborate, aluminum scales sewn on to a spandex base to create a glove. Patterns can be tricky, but this one was straightforward because of the spandex, because of the stretch you get a workable glove pattern by tracing your hand on paper.
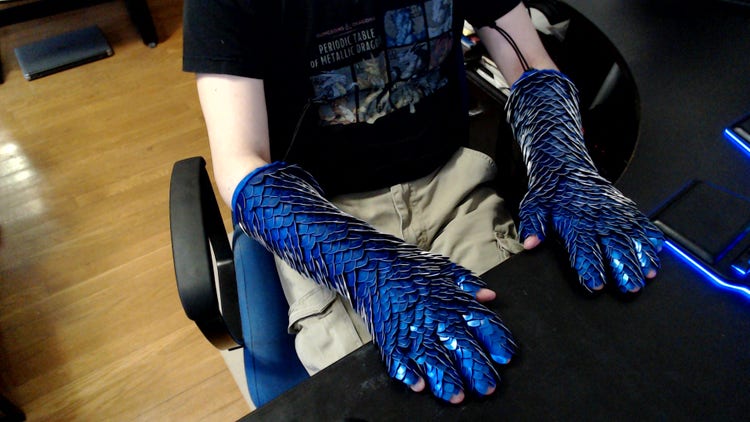
There are 500–600 aluminum scales on each glove.
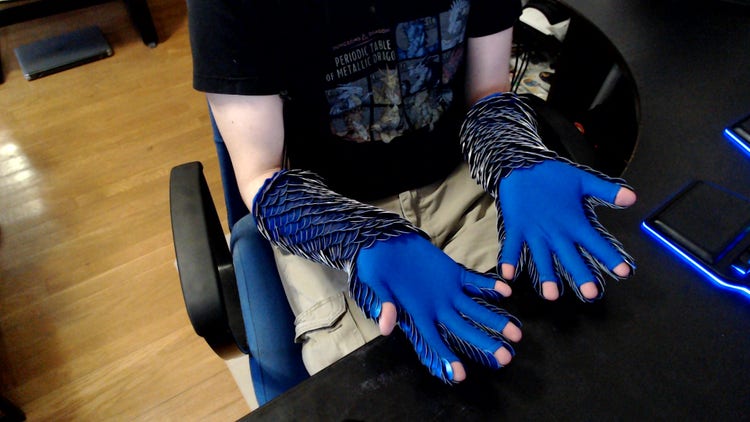
The scales have to be sewn close together to reduce gaps as the fabric stretches. Smaller scales are used on the fingers to achieve density.
The first thing I made with the scales was... a full dragon costume. Because I had no prior sewing or costume experience, I did a 2 x 2” test square of scales and used it to elicit the help of a friend who has a master’s degree in costume construction from Carnegie Mellon University.
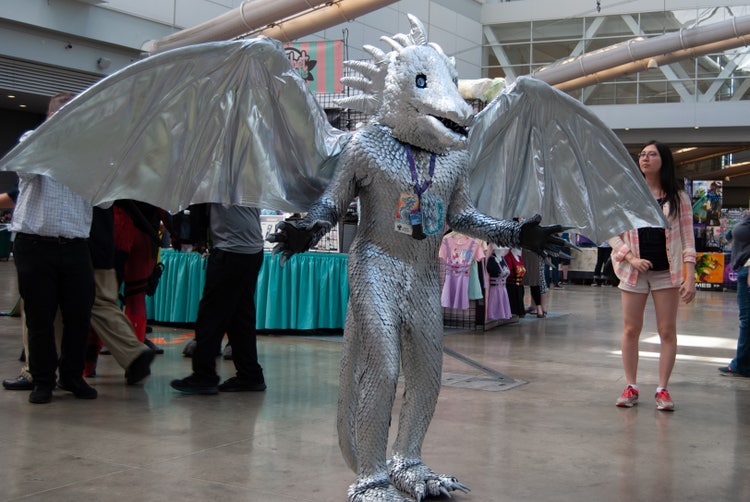
The head was hand-carved (by me) upholstery foam. The eyes are LED. And with some help from my roommates, I installed a fog machine in the head, so the dragon could exhale an icy mist (this dragon didn’t breathe fire). The claws are made of polymer clay and glued on to the gloves. The tail is articulated and composed of plexiglass plates bolted together with rivets and nylon strips, so it bends and twists like a real tail. The wings (which I didn’t make myself) are impressive and made by a studio called The Crooked Feather (the maker uses them now as a feature image for illustrating that commission type, Electric Dragon Wing—Tri Pivot).
From start to finish, it took about 800 hours (about 1 month) and was completed over a 2.5 year period during grad school. There are 12,000 hand-sewn aluminum scales on the body it (How do I know that? I’m in computer science, I tracked them.), and it weighs about 50 pounds (the longest I’ve worn it is about five hours and I was sore afterward). Since the aluminum scales are conductive, and affected by extremes in ambient temperature, if it’s either uncomfortably hot or cold outside the costume it’s equally uncomfortable inside it. And because I need help to put it on, and to prevent me from running into things when I’m wearing it, it requires a handler.
It probably comes as no surprise that I made the switch to smaller scale dragon hobby.
Dragons on a more manageable scale
During the Fall of 2020, when we were all spending most of our time inside (and at home), instead of being on my computer all the time I started searching for something to keep my hands busy. Since I knew how to sew, I turned to that again... although something on a different scale than the work I'd done before.
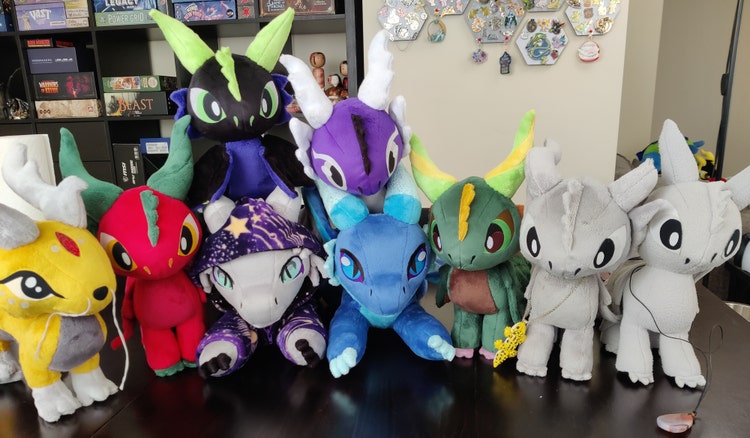
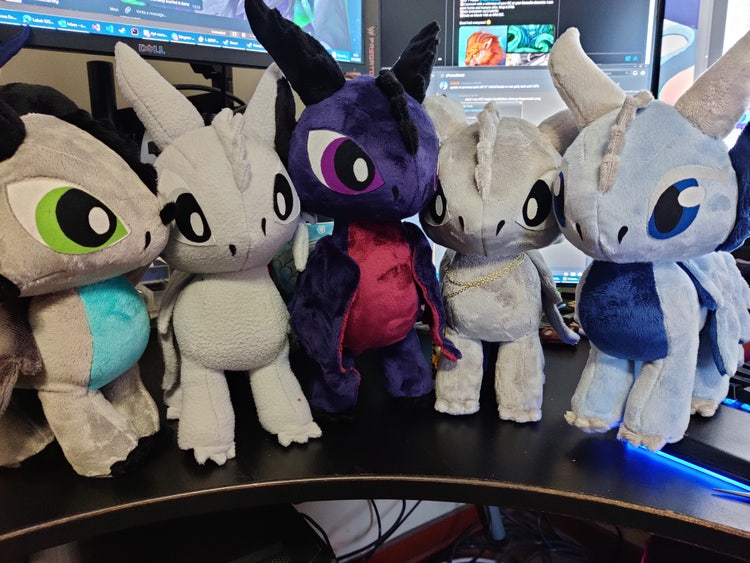
I started with the dragons in the image below. Although I didn’t make the patterns—that’s a skill that maybe I’ll work on someday—I struggled with the first one (second from the left was dragon number one). Since then, I use a straightforward process:
Step 1: Find a pattern
The first step in dragon-making is finding a pattern. The pattern for these dragons is from an Etsy store called Sew Desu Ne? (Translation, “I know, right?”) which is a great pun because the first word is pronounced "sew,” and it has nice, clear, easy to follow instructions. I choose patterns based on the result but since it can be hard to get a sense of a pattern's quality before buying it, if I like a pattern from one maker, I'll generally trust their other patterns too. And if you feel like making your own… go for it.
Step 2: Gather supplies
You’ll need some basic supplies like scissors (or a rotary cutter), an iron (for appliques), and a smooth surface for cutting. This is also the time to choose colors for the body, horns, scales, and wings. Have fun with fabrics, but don’t spend a lot on them your first time making a plush (I used fleece for my first one) because you will make mistakes. My “test plush" ended up with lopsided eyes.
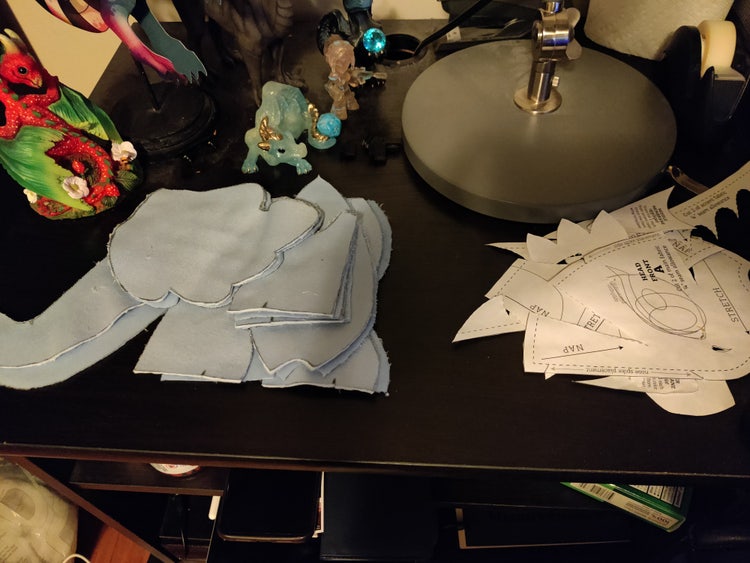
Step 3: Pattern layout and cutting
This step is straightforward, but it will take longer than you expect. Take your time. The fabric was a bit tricky for me to adjust to because it was thicker than the fabric I’d used for my dragon costume, but still stretchy. After having done it a few times, I have three pieces of advice: take your time, try not to stretch the fabric while cutting, and get a rotary cutter (it will save your wrists and fingers).
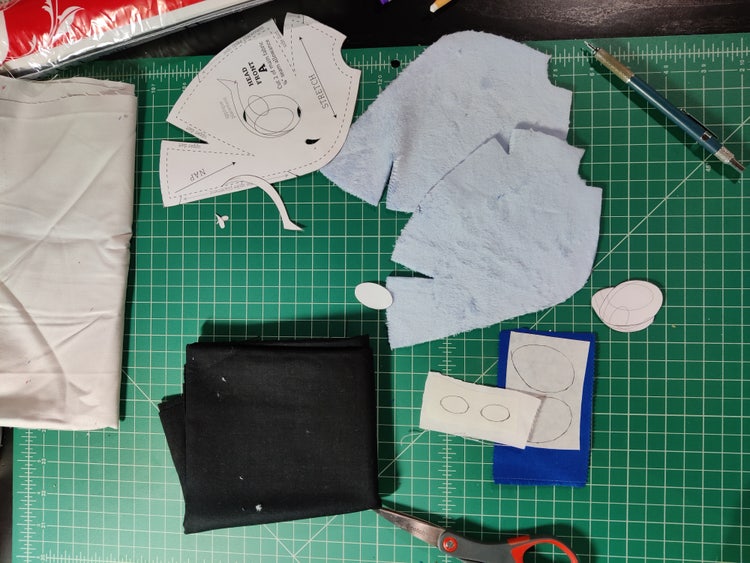
Cutting mats are a big return on a small investment when using rotary cutters and utility blades.
Use a water-erasable fabric pen to transfer any useful markings from the pattern pieces to the fabric.
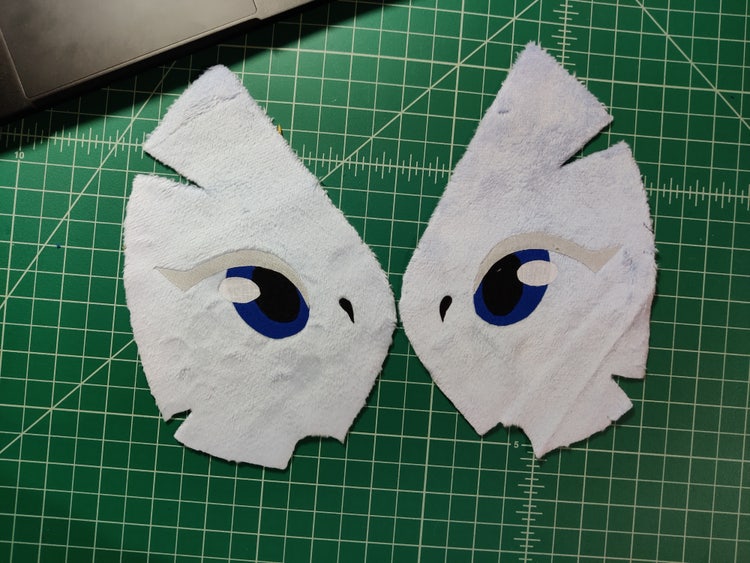
Step 4: Appliques
After cutting, the next step is applying the appliques. This seems like it would be one of the last things to do but because most applique work is either embroidered or ironed on, it’s the first assembly step. Before I got an embroidery machine, I used iron-on appliques. They’re like fabric stickers, held in place by a double-sided fusible lining, and getting them to “stick” requires using an iron.
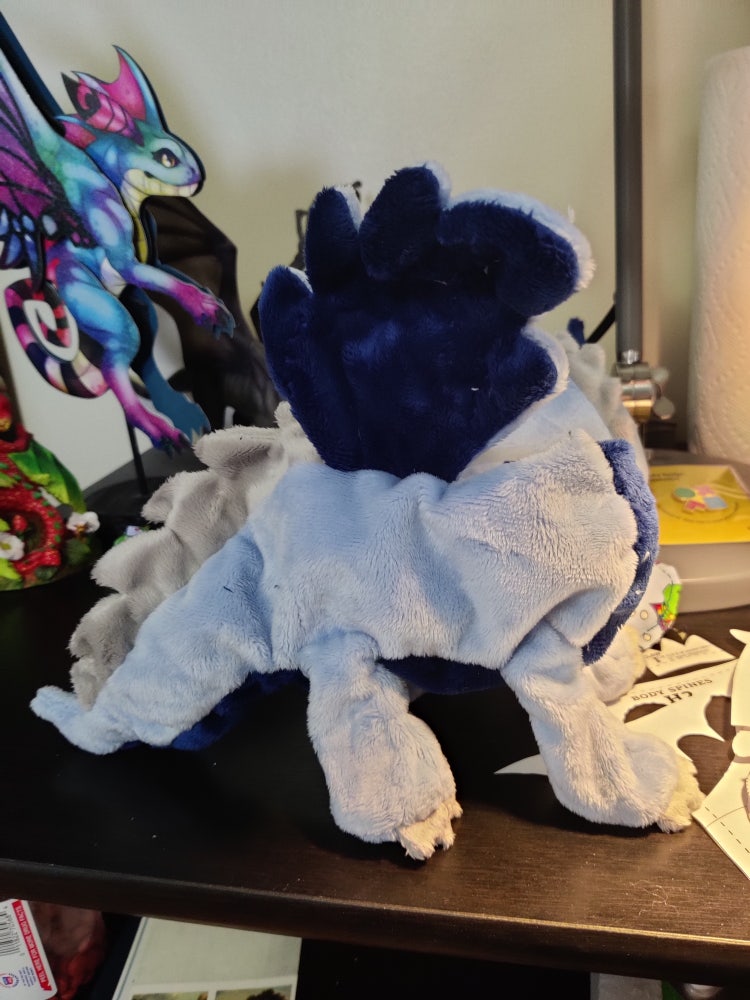
Step 5: Assembly and stuffing
This next step is assembling it according to the steps in the pattern. I don’t have a sewing machine, so I do everything by hand. I usually do this part while watching Critical Role (a web series in which professional voice actors play Dungeons & Dragons), which gives me three to four hours to work on a plush. After everything’s constructed, it’s time to put the stuffing in. Once you’ve done it a couple of times, this part is perfect work if you’re listening in on any sort of presentation because it doesn’t require a lot of concentration.
At this point, I’ve made 32 dragons, 1 horse, 1 hyena. Most of them have been given names and sent to friends but I often post them on Twitter before shipping them off. Most other dragon-related endeavors are chronicled on my website.